With Single Sign-on, or SSO for short, users have a single login across all apps your team is using. It makes life easier and more secure for everyone and reduces administrative overhead.
SSO feature is available only in the Ultimate plan.
TimeCamp supports SSO through SAML 2.0, which means that you can integrate with most major Identity Providers such as OneLogin or Okta, or any other SAML 2.0 compliant company.
Enabling the SSO feature doesn't automatically invite users to your TimeCamp account.
List of native SSO providers
- OneLogin
- Azure Active Directory
- Okta
- GSuite (Google Apps)
- Any SAML 2.0 custom implementation
How to configure the SSO?
TimeCamp supports SSO via SAML 2.0 standard.
Step 1
To enable SSO authentication, you need to set a connection between TimeCamp and your Identity Provider. Start by getting the following from your Identity Provider:
- SSO URL (also called a Login URL, Single Sign-On URL)
- issuer URL (also called Entity ID)
- X.509 certificate
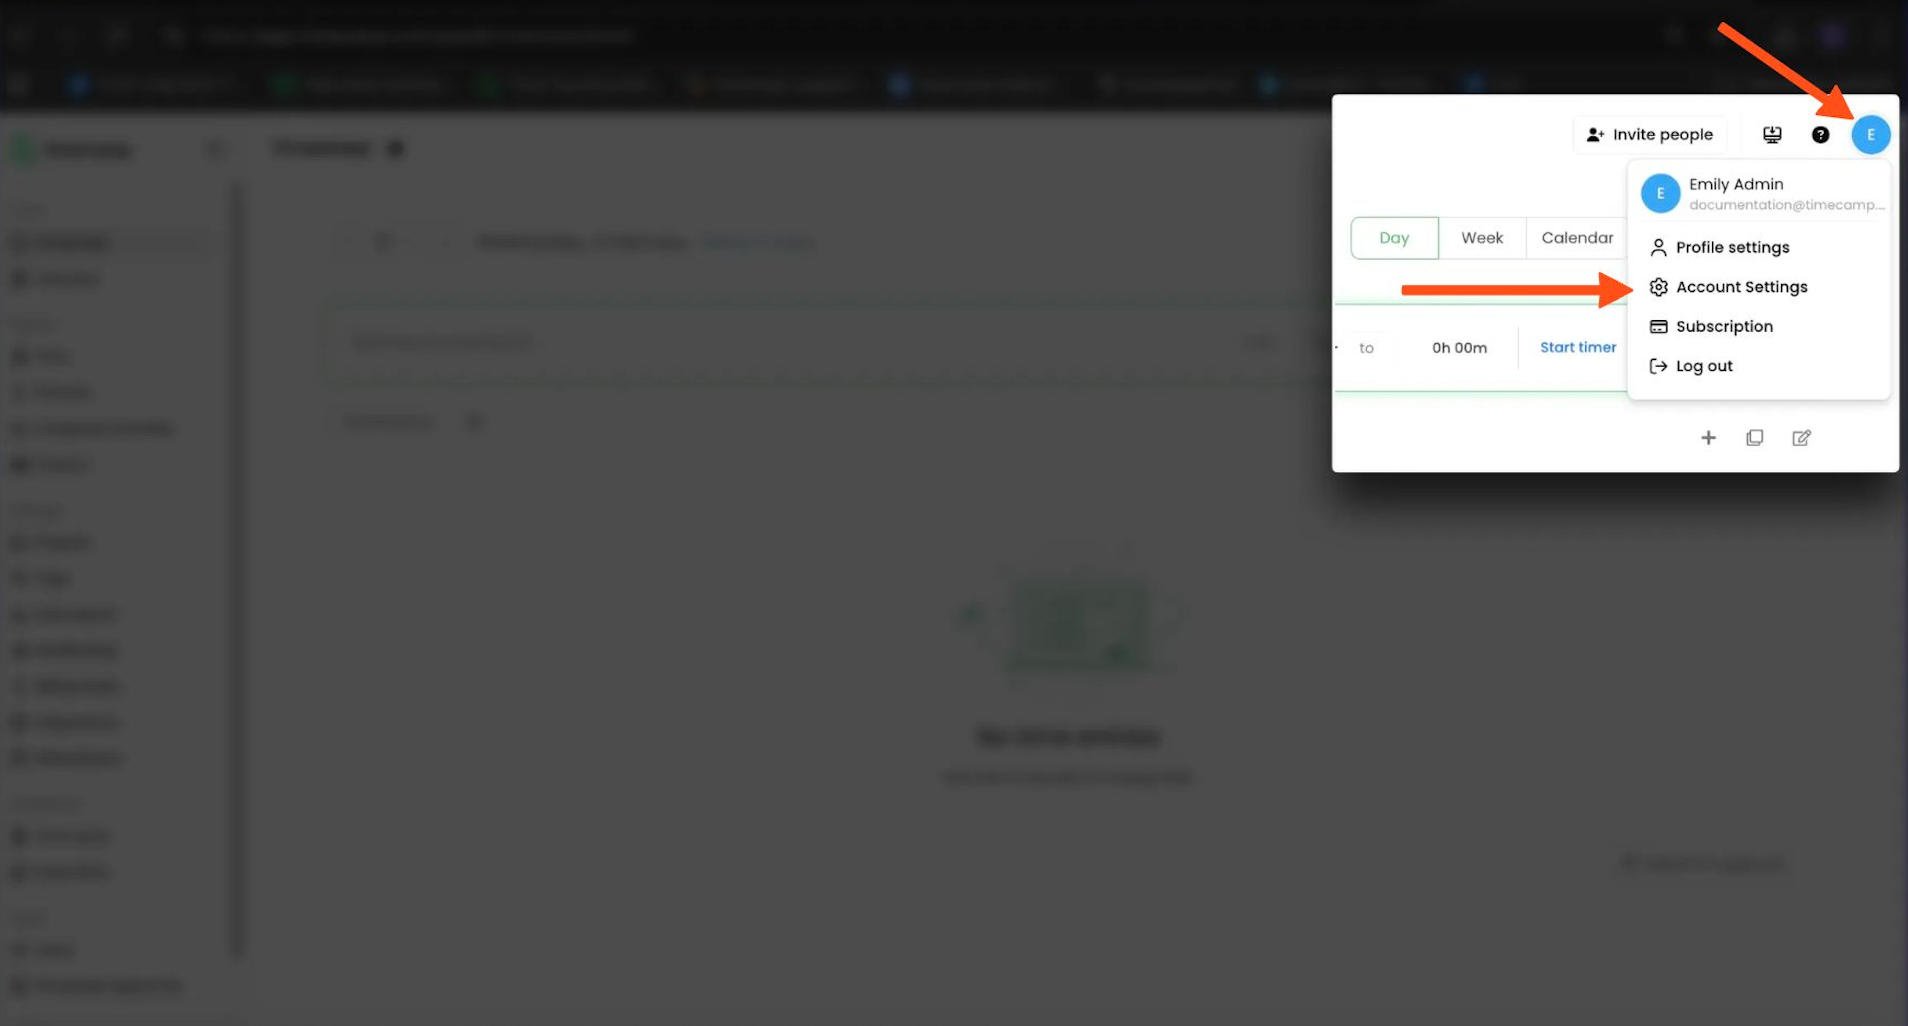
Step 2
Click on your avatar in the upper-right corner and select the Account Settings option. Next, go to the Modules tab, find the Single Sign-On login module, and click on the switch button to enable the SSO. After the module is enabled click on its Settings.


Step 3
Select the Identity Provider you’re using in your company or choose to configure your own SAML implementation.

After selecting the Custom SAML 2 option please fill in the following data.
Optionally you can enable the option Block authenticating using login and password. It will block the ability to log in from the mobile and desktop app.

Step 4
Click on the green Save settings button to enable SSO.

Here you can find examples explaining how to configure Azure Ad and Google Workspace step by step.
Additional information some SAML providers require
- ACS URL: https://app.timecamp.com/saml/acs
- Sign on URL: https://app.timecamp.com/auth/login
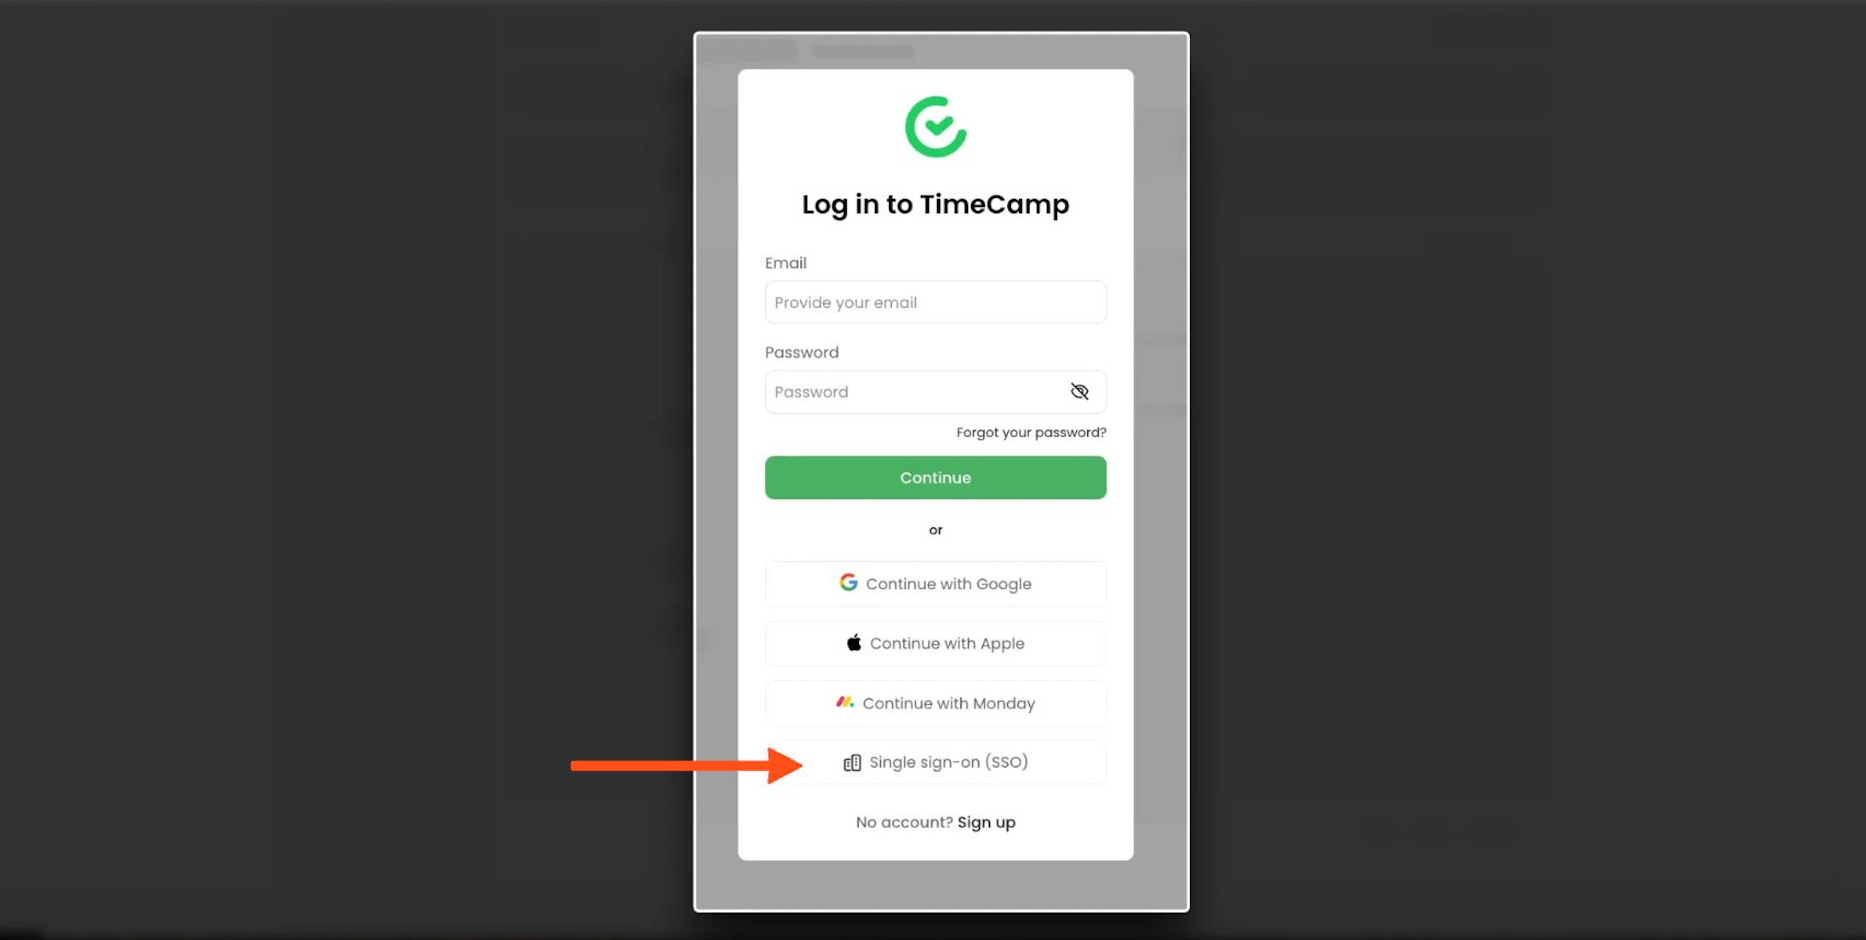
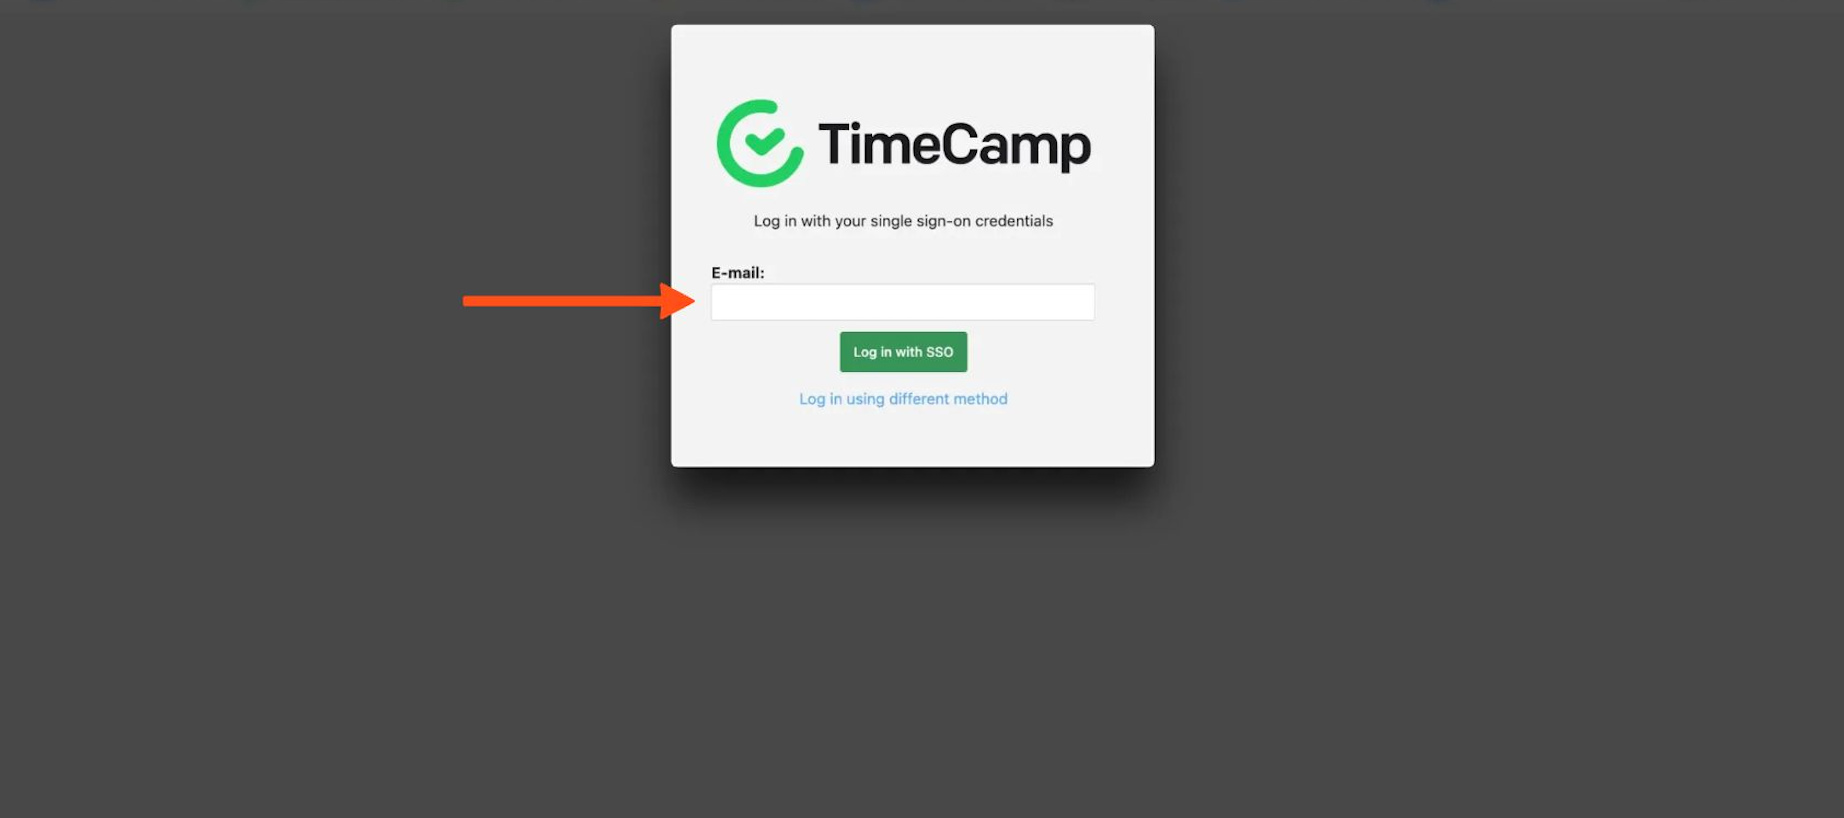
How to log in?
Once SSO is enabled, users will log in to TimeCamp by entering their email addresses. The system will redirect them to the Identity Provider’s sign-in URL, where they need to enter their SSO credentials.
On the TimeCamp login page, click on the Log in with SSO link, provide your login, click Log in with SSO and you’ll be redirected to the SSO login page. If you’re already authenticated, you’ll be logged in automatically.