The Attendance module is a great option if you want to use TimeCamp to manage your account users' time and their days off. You can see the start and end of your working day, track efficiency, and manage vacation hours, holidays, or sick leaves.
The Attendance feature is available only in Starter, Premium and Ultimate plans.
How to enable the Attendance feature?
Only the Administrator of the account can enable the Attendance module.
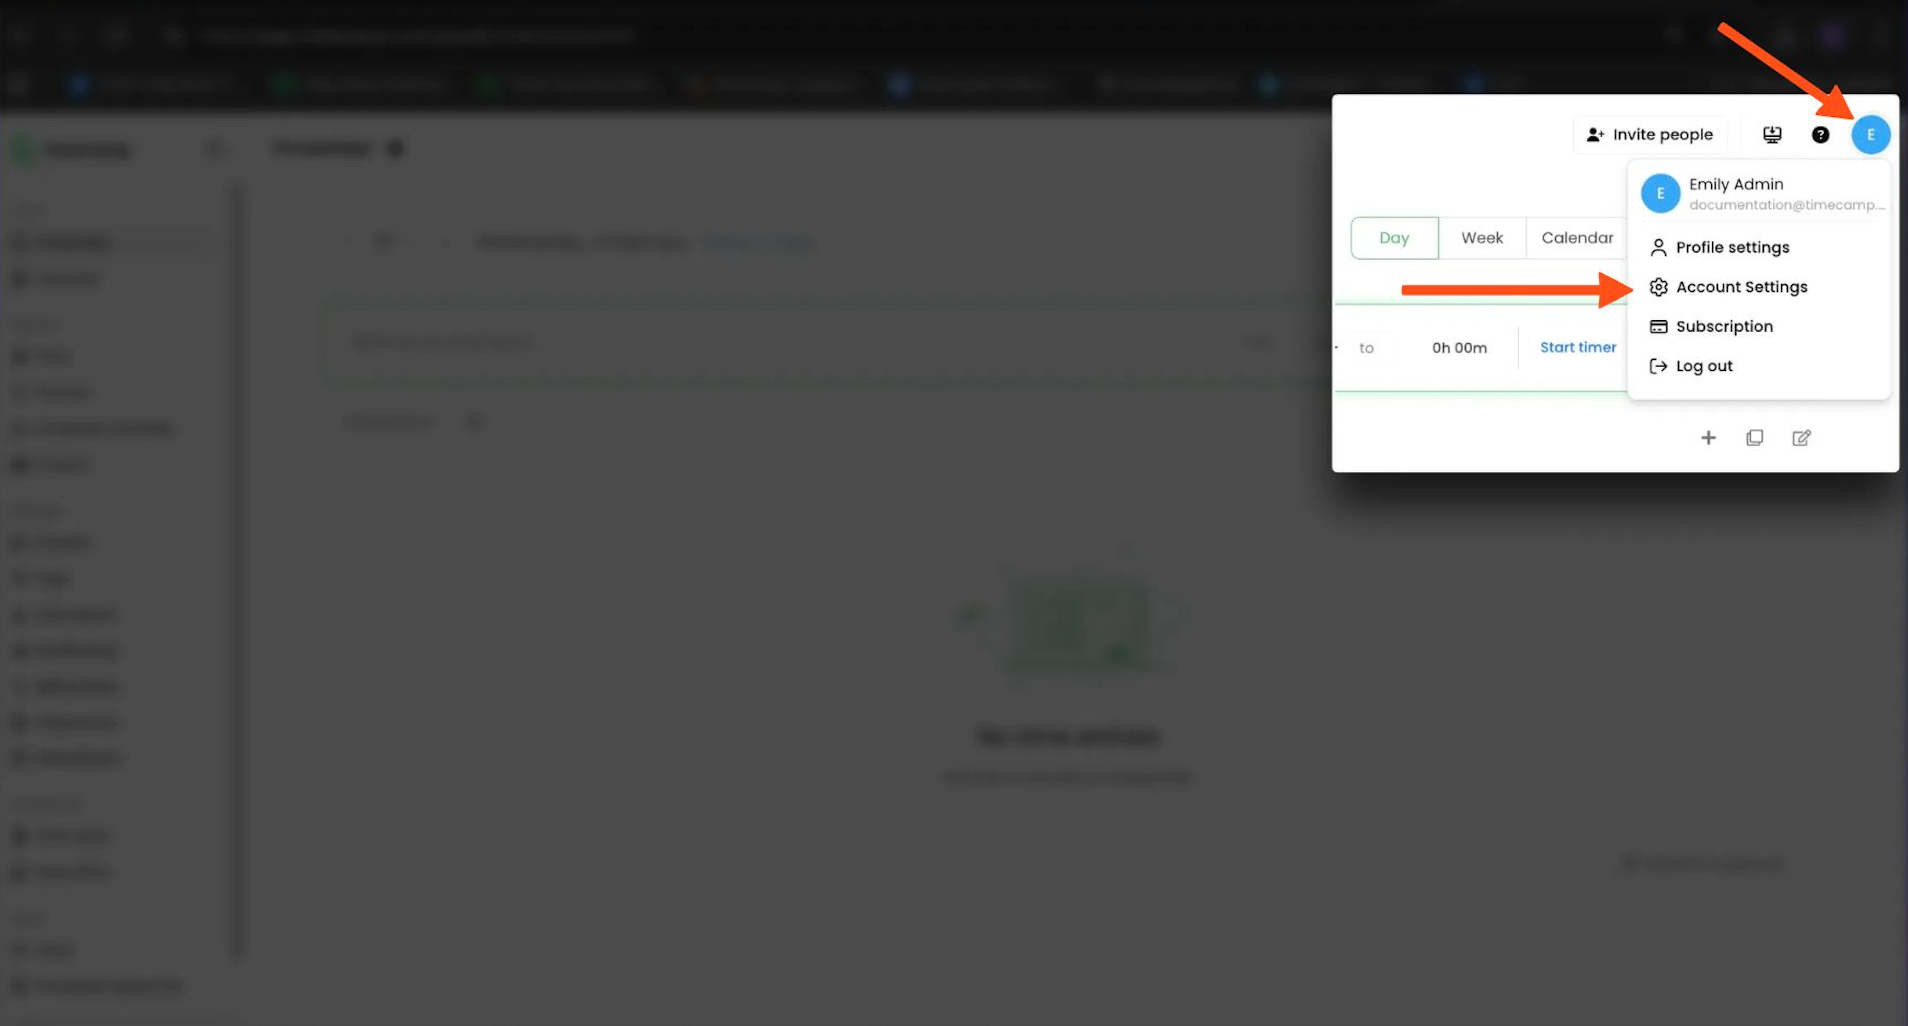
To enable the Attendance feature, click on your avatar in the upper-right corner and select the Account Settings option. Next, go to the Modules tab, find the Attendance module, and click on the switch button to enable Attendance. After the module is enabled click on its Settings.


After the module is enabled you can find the Attendance section on the left side menu. If you decided not to use the Attendance module you can simply disable it in the Modules tab.

Attendance settings
To open the Attendance settings and set up your account click on the "gear" icon next to Attendance.

The additional way to access settings is to click on your avatar in the upper-right corner and select the Account Settings option. You'll be redirected to the General tab where you can use the shortcut to get to the Attendance settings.

Let's go through all of the available options.
- Select a group - specify the group for which you are making changes to the attendance module settings. All approved settings and dates will apply to the selected group, and each group can have different settings.
Please keep in mind that by default a subgroup inherits settings from its parent group.

- Use data from - you can choose between Timesheets and Computer activity data from the desktop application.
Selecting Timesheets will display data based on time tracked to projects, such as total time worked, time of first and last entry (and time between first and last), vacation hours used, day type, and more.
Selecting Computer activity will display data based on time tracked by the desktop application, such as computer usage, the total time between computer turns on/off, break time, paid time, and more.

You can export the attendance report in XLS format and share it with others.
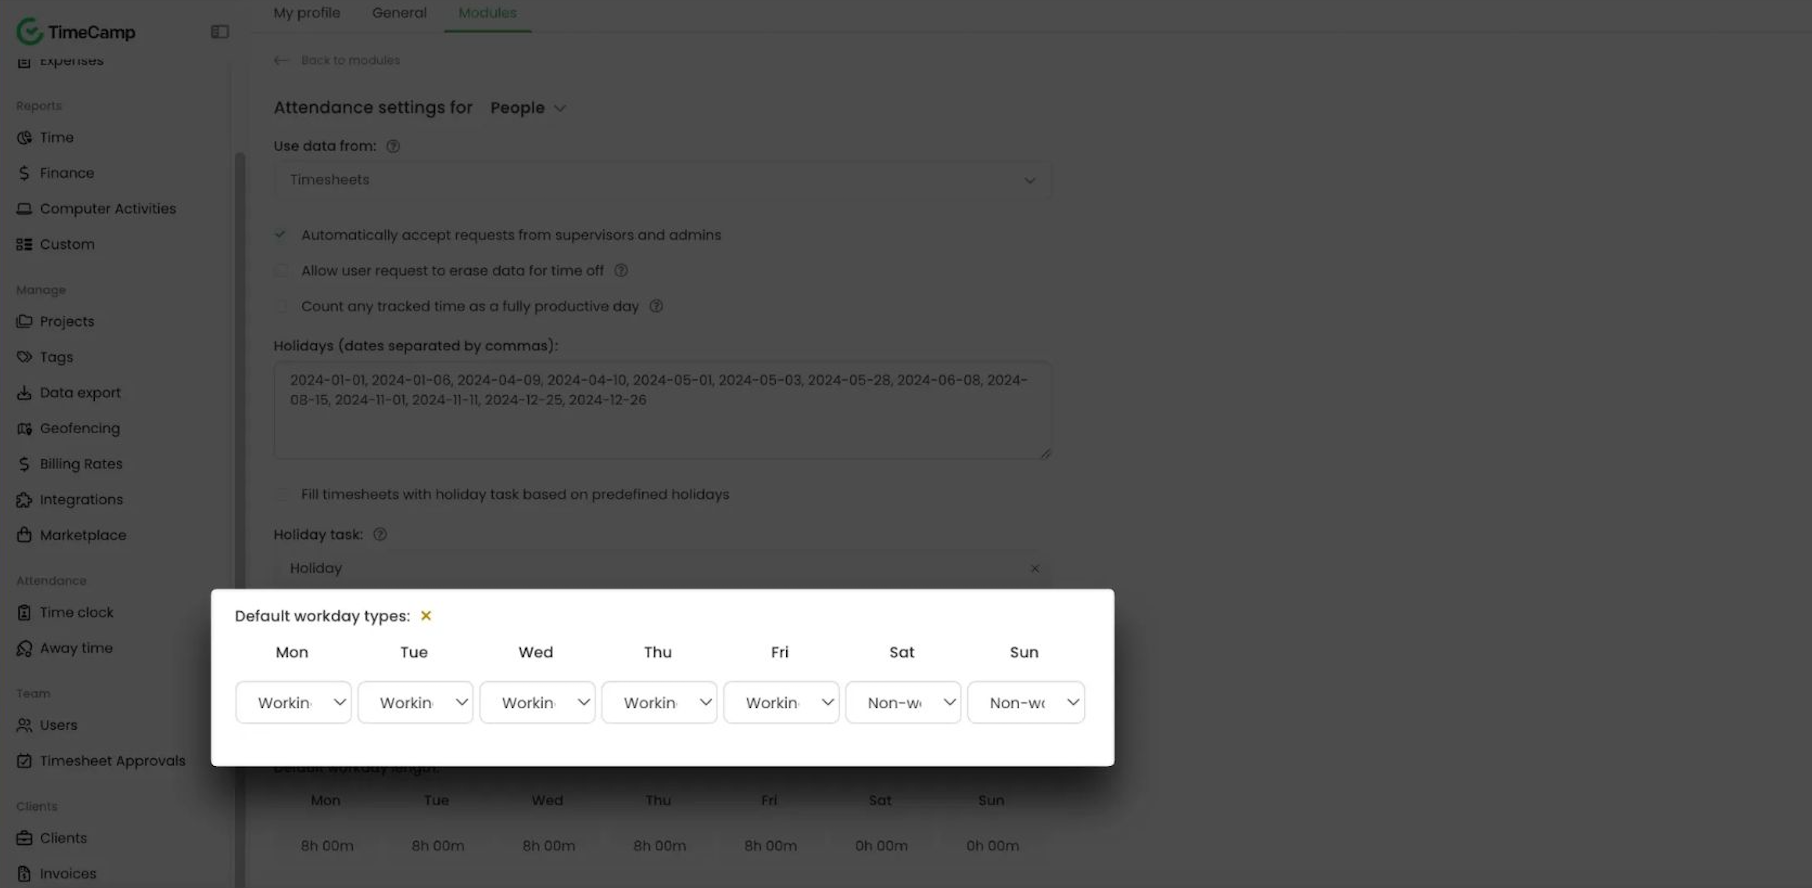
- Holidays - add dates in the YY-MM-DD format, as are examples shown on the screenshot below, to automatically set them as Holidays in the Attendance report.
Optionally you can set a special task for your holidays. This way each timesheet for the day added to the holidays will be filled with this task. To do that create a project in the Projects tab and select it from the projects picker afterward.

- Default workday length - sets the number of hours for each workday. It will be beneficial when making sure you don't spend too much or not enough time at work. The default workday length will be visible in the Attendance report in the Should be column. If the time spent on work is lower than the default one, it will be red in the report.

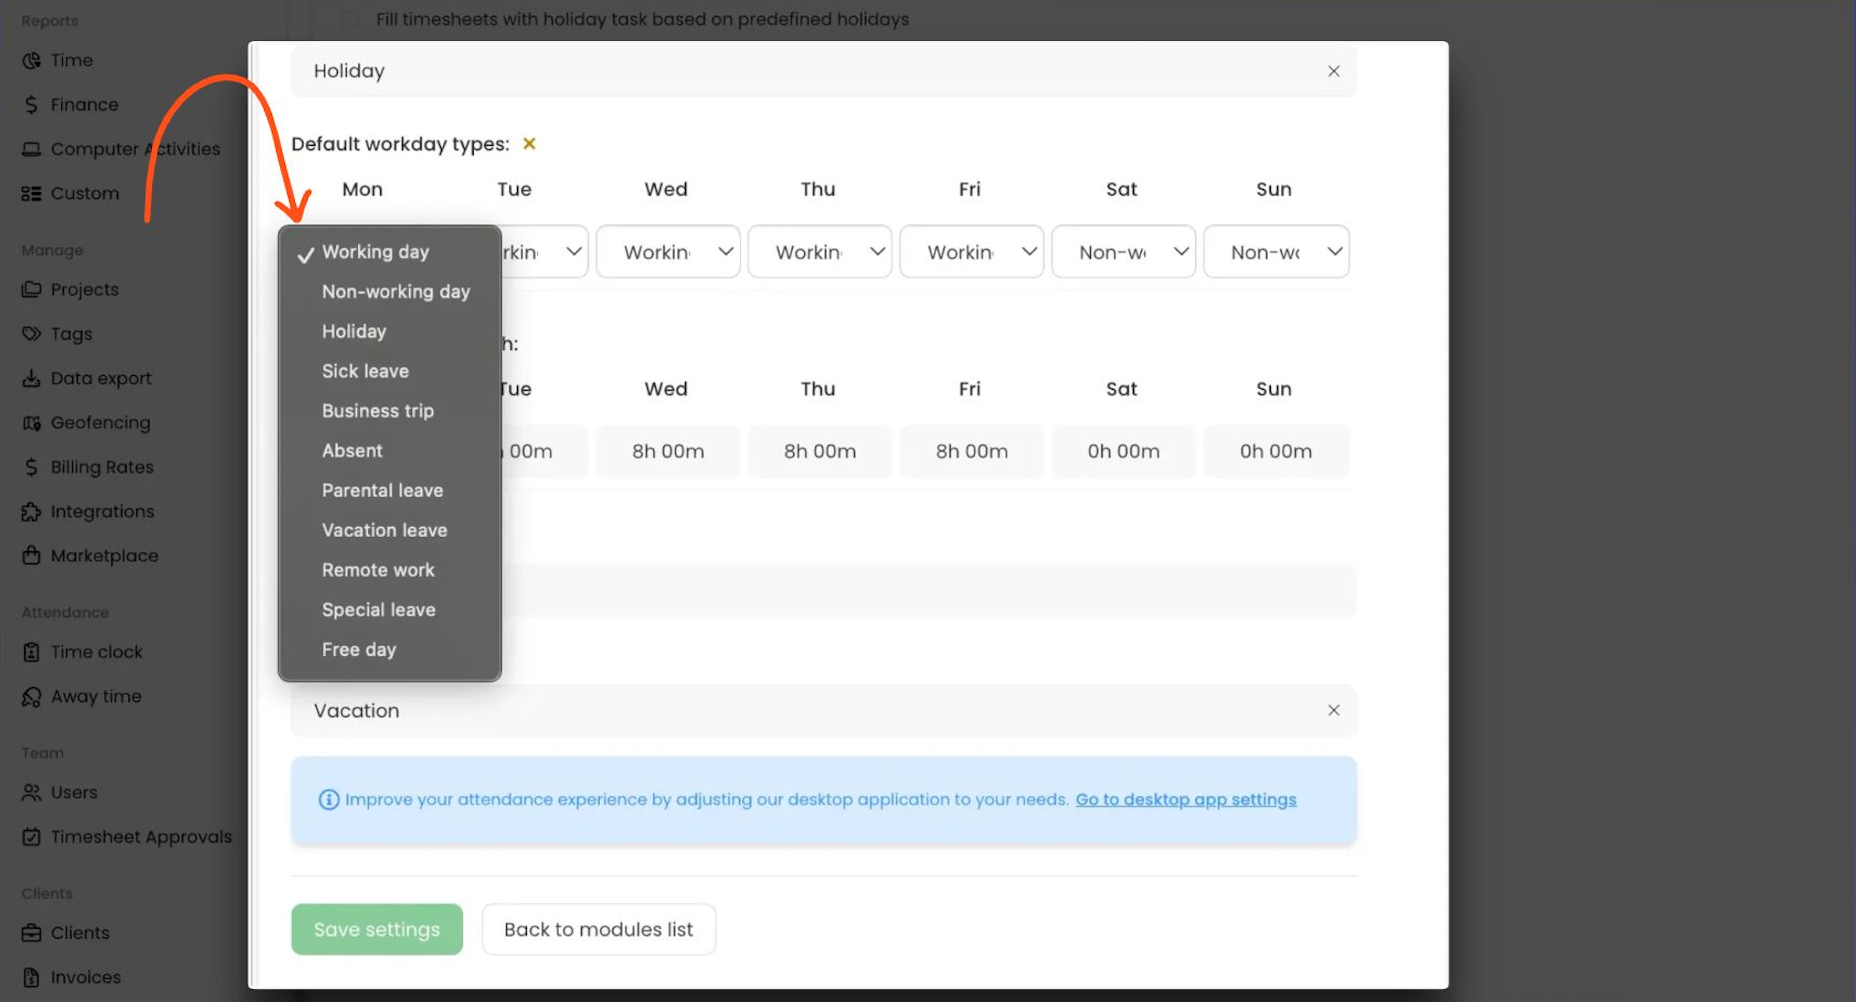
- Default workday types - sets the day type for each workday
You can select a default workday type from a drop-down list:
To inform users when their weekly limit is reached and they started to log overtime hours turn on the option Send email to users who reached weekly limit in Time tracking settings.
- Vacation - you can decide on the number of vacation hours for users from the group you are editing. Your coworkers can send requests for a vacation on a specific day and you will be able to see and accept or reject them in the Attendance tab (the yellow Awaiting requests button). Optionally you can set a special task for your vacations.

If you want to create an exception for certain users, you need to go to their profile settings and assign personal vacation hours amount to them, which would override the global setting. To do that go to the Users tab on the left side menu, click on the name of the desired user and navigate to the Vacation hours setting. Now you can set a different number of vacation hours for this specific person.
