Zendesk is a leading, innovative customer support platform, which allows you to connect and provide help to your customers on a personal level.
Overview
The integration will be enabled to the entire account, so all users will be able to track time on imported tasks. The integration will be connected to the Zendesk account of the person who enabled the integration.
Tickets will be imported as tasks under the Zendesk project. We don’t provide an option to select tickets that should or should not be imported from Zendesk to TimeCamp. After the integration is enabled all tickets the owner of integration has access to, will be imported to the Projects module in TimeCamp.
It is not possible to edit the structure of imported tickets in TimeCamp.
As an integration creator, you automatically gain access to all imported items. Other users are assigned to tasks (tickets) automatically in TimeCamp based on their email addresses, which need to match in both TimeCamp and Zendesk. You can always assign tasks manually as well. If users are assigned to the main project Zendesk they will be able to track time to all tasks under the Zendesk project structure. If users are assigned only to certain tasks, they will be able to track time only to these tasks and subtasks under the tasks’ structure.
Tickets marked as solved or deleted in Zendesk will be automatically moved to the list of Archived tasks in TimeCamp. If you create a new ticket in Zendesk it will be automatically imported to TimeCamp within 3 hours. To immediately synchronize the integration and update newly added items use the “Force synchronization” option on TimeCamp web Timesheet. Synch will be executed within a few seconds.

The additional functionality we provide for a Zendesk integration is a TimeCamp plugin that allows tracking time directly on the Zendesk website.
If you track time using the TimeCamp plugin in your Zendesk tickets, the history of tracked time will be visible in the plugin view.

If the user who enabled the integration is not a part of your account anymore, we recommend reenabling the integration.
Enable integration
Only the Administrator of the account can enable the integration.
Step 1
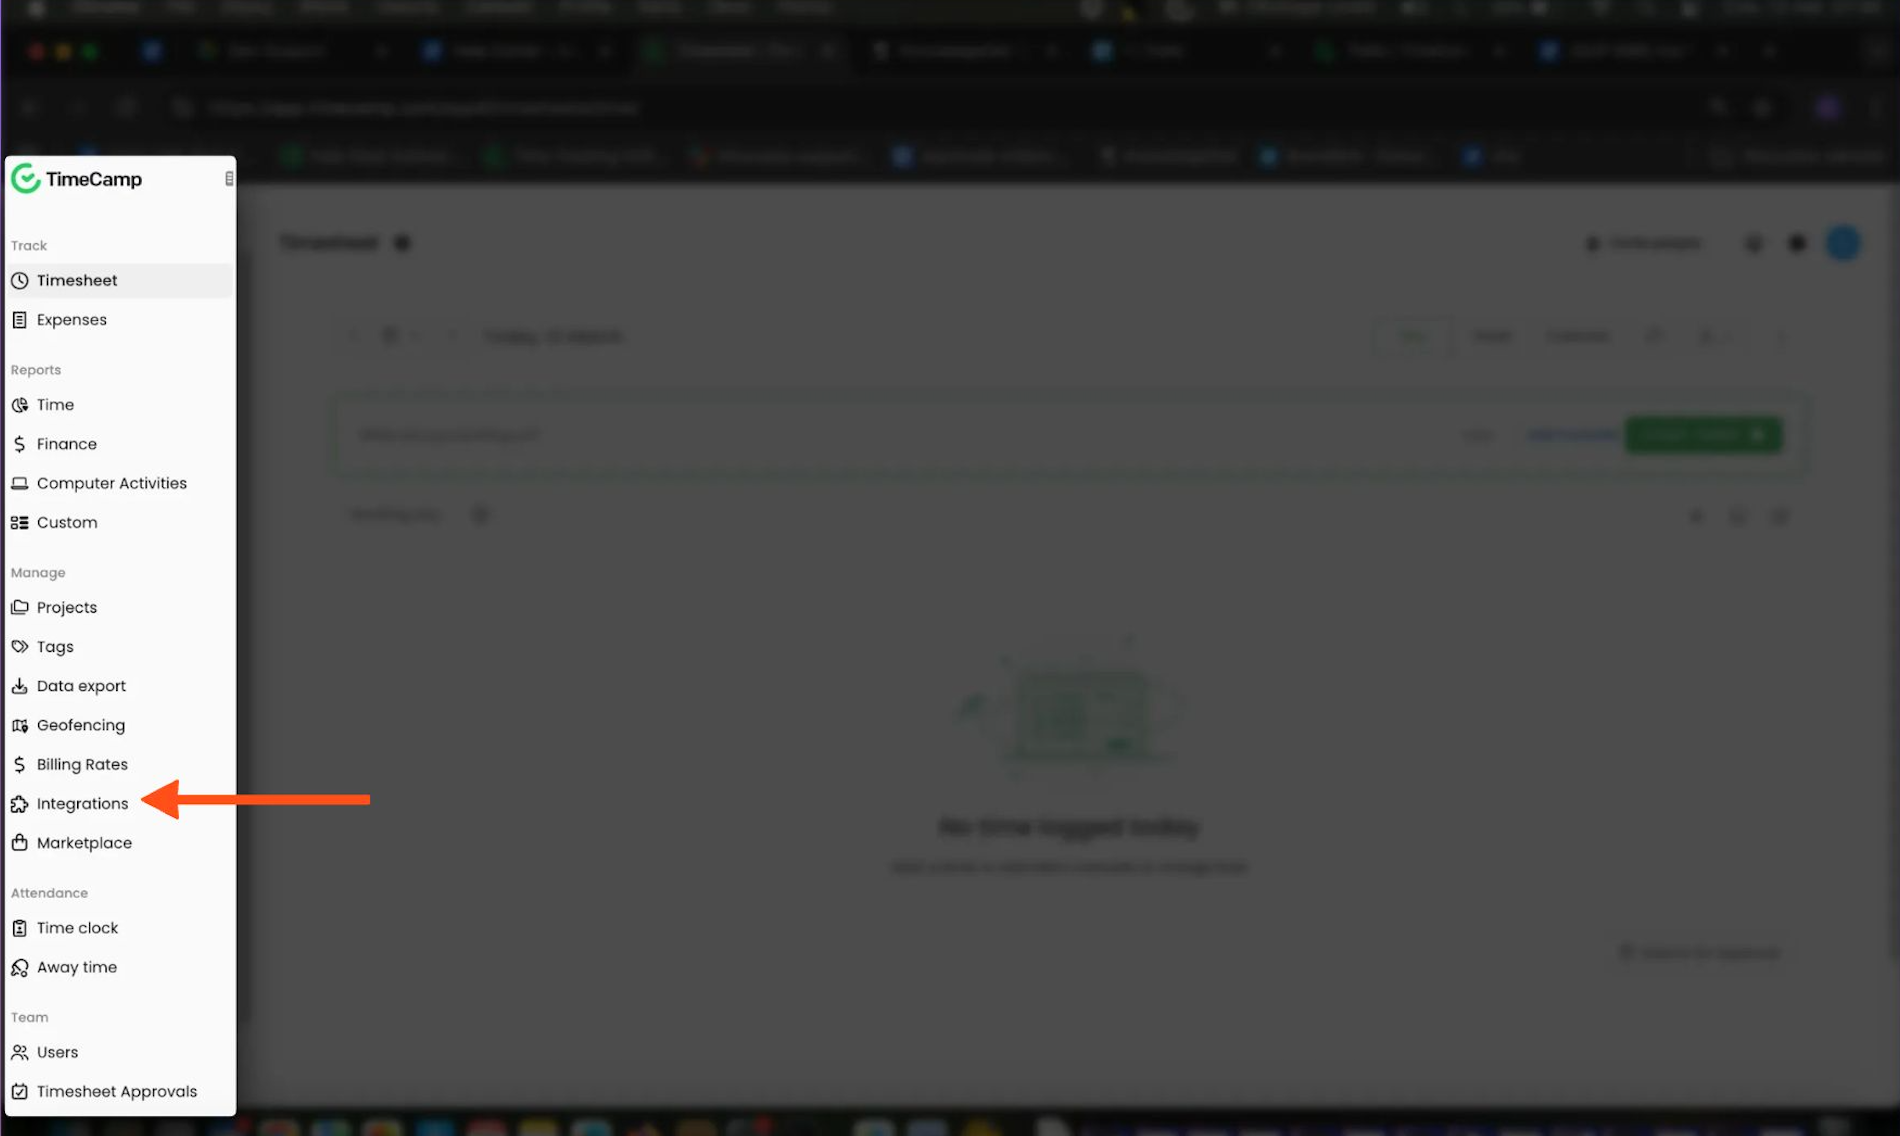
To enable the Zendesk integration, select the Integrations option in the left panel. Next, find the Zendesk integration on the list and click the Enable button.


Step 2
Enter your Zendesk URL address. The URL address you can find in your web browser, after logging into your Zendesk account. We’ll need only the part with your account name.

Step 3
Next click on the green Enable integration button.

Step 4
You’ll be redirected to Zendesk and asked to grant TimeCamp authorization to access data from your account. To continue click on the Allow button.

Step 5
Optionally you can set up a few additional settings:
Import organizations for Invoicing - organizations from Zendesk will be imported under the Clients section in TimeCamp so you can use it for creating invoices;
Import only tickets from selected forms - if you use a few different ticket forms in Zendesk you can define which exactly forms should be imported to TimeCamp;
Import budget from custom field - if you created a custom field in Zendesk that indicates ticket budget you can input the ID of this field and define the unit of budget (Hours or Fee). This way ticket budget will be automatically imported to TimeCamp and you'll be able to generate Estimates reports on tracked time;
Mark the checkboxes next to the preferred options and click on the green Save button.

All your Tickets will be imported to the Projects module in TimeCamp. All imported items will be accessible for you to track time using TimeCamp’s timesheets, mobile, desktop application, or TimeCamp plugin in Zendesk.
Track time on imported items
There are a few ways of tracking time in TimeCamp. After the integration is created and all your tasks are imported, you can simply select the desired task from the list and start your timer. Below you can find examples of all available ways of tracking time.
Web Timesheet. Simply select a task using a search box or the drop-down list and run the timer. Learn more
Desktop app. Click on the “No task” option in a task widget or use the option “Start a task” from the desktop app menu and use a search box or the drop-down list to find the target task. The task widget will be automatically synchronized with your web Timesheet. Learn more
Mobile app. Go to your Timesheet in the mobile app and click on the “Add" button if you want to create an entry manually or on the “Start” button if you prefer to track time in real time. Next use a search box or the drop-down list to find the target task and start tracking. Learn more
Zendesk plugin. If you installed TimeCamp plugin from Zendesk Marketplace and logged in to your account, the TimeCamp app widget will appear on the right side of your screen under the Apps tab when you navigate to your tickets. Just open the ticket and click on the “Start timer” button to start tracking. When you finished tracking just click on the red “Stop tracking” button. The plugin will be automatically synchronized with your web Timesheet. Learn more

Automatic time tracking
If you installed TimeCamp desktop app and wish to track time automatically, Zendesk integration allows you to easily set up this option. After the integration is enabled your tickets ID, along with the requester’s email address, will be automatically imported as keywords and added to tasks in TimeCamp.
This way, you can track time spent on tickets automatically, using our desktop application and automatic time tracking mode. The timer will be started automatically when the application matches the assigned keywords with the URL address of ticket you’re currently working on.


Disable integration
Only the Administrator of the account can unlink or re-enable the integration.
Step 1
If for some reason you would like to reenable or unlink the integration, select the Integrations option in the left panel. Next, find the Zendesk integration on the list of active integrations and click on its Settings.

Step 2
Next, to unlink the integration simply click on the Unlink integration button.

To re-enable the integration input the updated URL address of your Zendesk account and click on the Re-enable integration button. The list of your active tickets imported to TimeCamp will be updated immediately.
