In the Users tab, in the menu on the left side, you can manage your coworkers’ accounts. You can invite new users, set their account roles, and define special tracking permissions.
Only the Administrator of the account has access to the Users tab and can manage users.
Invite Users
To invite a new user navigate to the Users tab on the left side menu and click on the green button + Invite people.
If you're subscribed to a paid plan, make sure that you have enough seats before inviting new coworkers. To check that, navigate the Subscription menu and add licenses if needed.

You can invite people in 3 ways, depending on your needs:
manually enter email addresses in the empty fields;
invite multiple users at once (import CSV file with addresses of your team members);
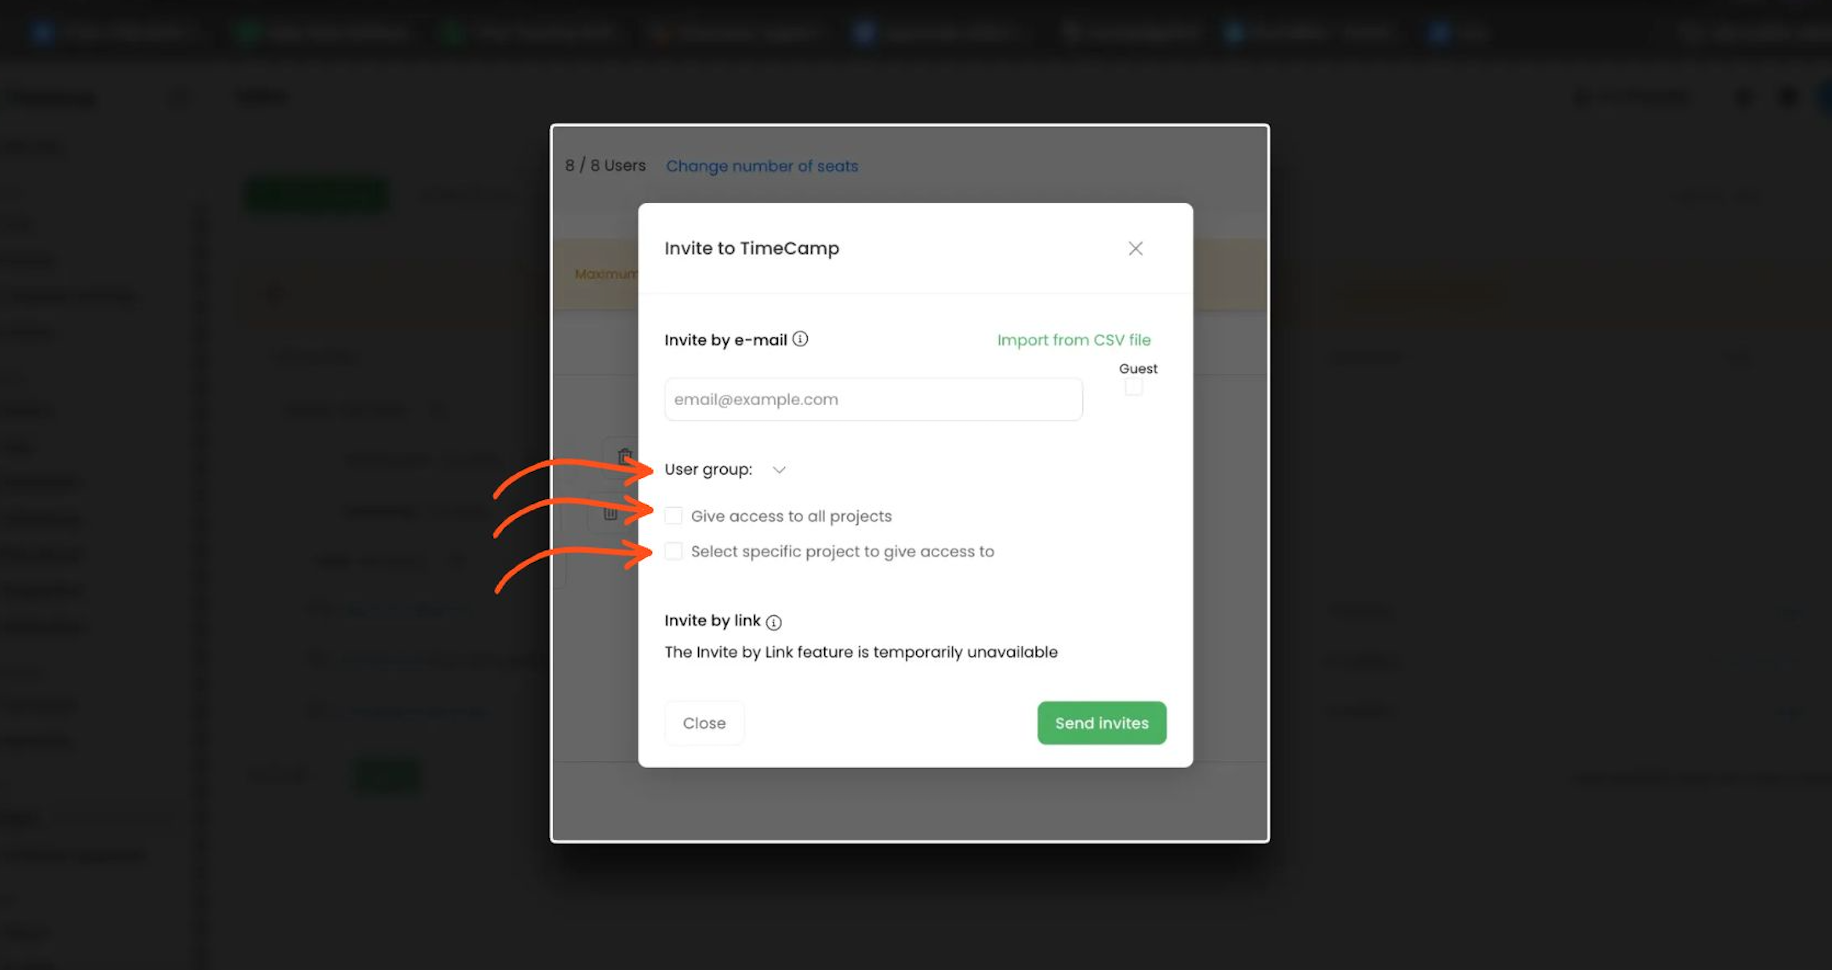
In the invitation window, you can pick the user group they should be invited to and select specific projects, or give them access to all projects.
If neither specific projects nor all projects were selected in the invitation window, user won't be automatically assigned to any of your existing projects.
Invited users must accept the invitation sent to their email address to become a part of your team on the account.
If for some reason user didn't accept the invitation or deleted the email you can resend the invitation using the envelope icon at the top of your Users list.

It is not possible to invite multiple users at once by importing the CSV file if at least one of the users already has an account in TimeCamp.
If a new user already has their own account, you can still invite them by sending an email invitation. Such user will receive an email invitation with a link and after accepting the invitation their account will appear on your Users list.
Take a look at our Getting Started Guide to learn more about inviting new users. If you'd like to recreate your company’s structure and divide users into groups, check these instructions.
Manage users
After new users accepted the invitation you can change their account and project roles and adjust tracking permissions.
We provide 3 different account roles that may help to organize the team's structure and define tracking permissions. You can choose between 3 user classes:
- Administrator
- Supervisor
- User
Here you can learn more about each available role and tracking permissions.
To change the role simply click on the current role next to the user's name and choose a new one from the drop-down menu.

To get to the profile setting of each user click on their name on the list and you'll be redirected to the detailed information about their profiles, such as name, email address, email notifications, and time tracking permissions.

In the profile settings, you can also change the password to the user’s account. If you would like to use this option, first enter your own Admin password and next enter a new user's password and confirm this new password. Learn more