Timesheet is one of the main sections in TimeCamp where you can track time to your projects, create and edit time entries and optionally add notes or tags for better categorizing. We prepared 3 types of timesheets: day, week, and calendar.
Timesheet is available for all subscription plans and all account roles.
Calendar timesheet is a graphical view that remains a calendar board. It allows you to quickly and easily add time for a specific timeframe during the desired day.

Calendar view allows tracking time in real time as well as manually adding time entries. Compared to a Day view you don't have to switch between these two modes as we provide different methods for tracking and manually adding time here.
If you'd like to hide or keep only the Calendar view on your Timesheet please navigate to the Time Tracking settings and edit the Timesheet view options. Changes will be applied to all users on your account.
Start timer
Please keep in mind that real-time tracking is possible only for the current day. If you would like to add time to the past or future days you can do it only manually.
If you’re in the today's week view, the current hour has a green Start timer button. Simply click on it and you’re good to go. Select a task, optionally add notes or tags and when you’re done with tracking, click the Stop tracking button and a new entry will be ready.

After you finished working on a task, don’t forget to stop the timer. Closing a web application or turning off your computer won’t stop the running timer.
Add time entry
To manually fill up the calendar timesheet activate a specific day by clicking on its column, so the focus of the timesheet will be changed to a selected day. Next, click on the time you’d like your entry to start, and holding the mouse button, drag the cursor down. Release the button when ready and fill out the information such as task and optionally notes or tags.
You can also modify the exact timeframes of entry in the editor panel which appears after clicking on a specific time entry.
If you would like to fill in your Timesheet for the past or future days, use the Date range filter to select the week you'd like to edit.

Timesheet options
Calendar timesheet contains a few additional functionalities which will help to manage time entries.
On the top part, the Administrator of account has access to the People picker, which allows to choose a user from their team and view their Timesheet. Time Tracking Administrator also has the ability to edit other users' timesheets.

Here you can learn more about account roles and permissions.
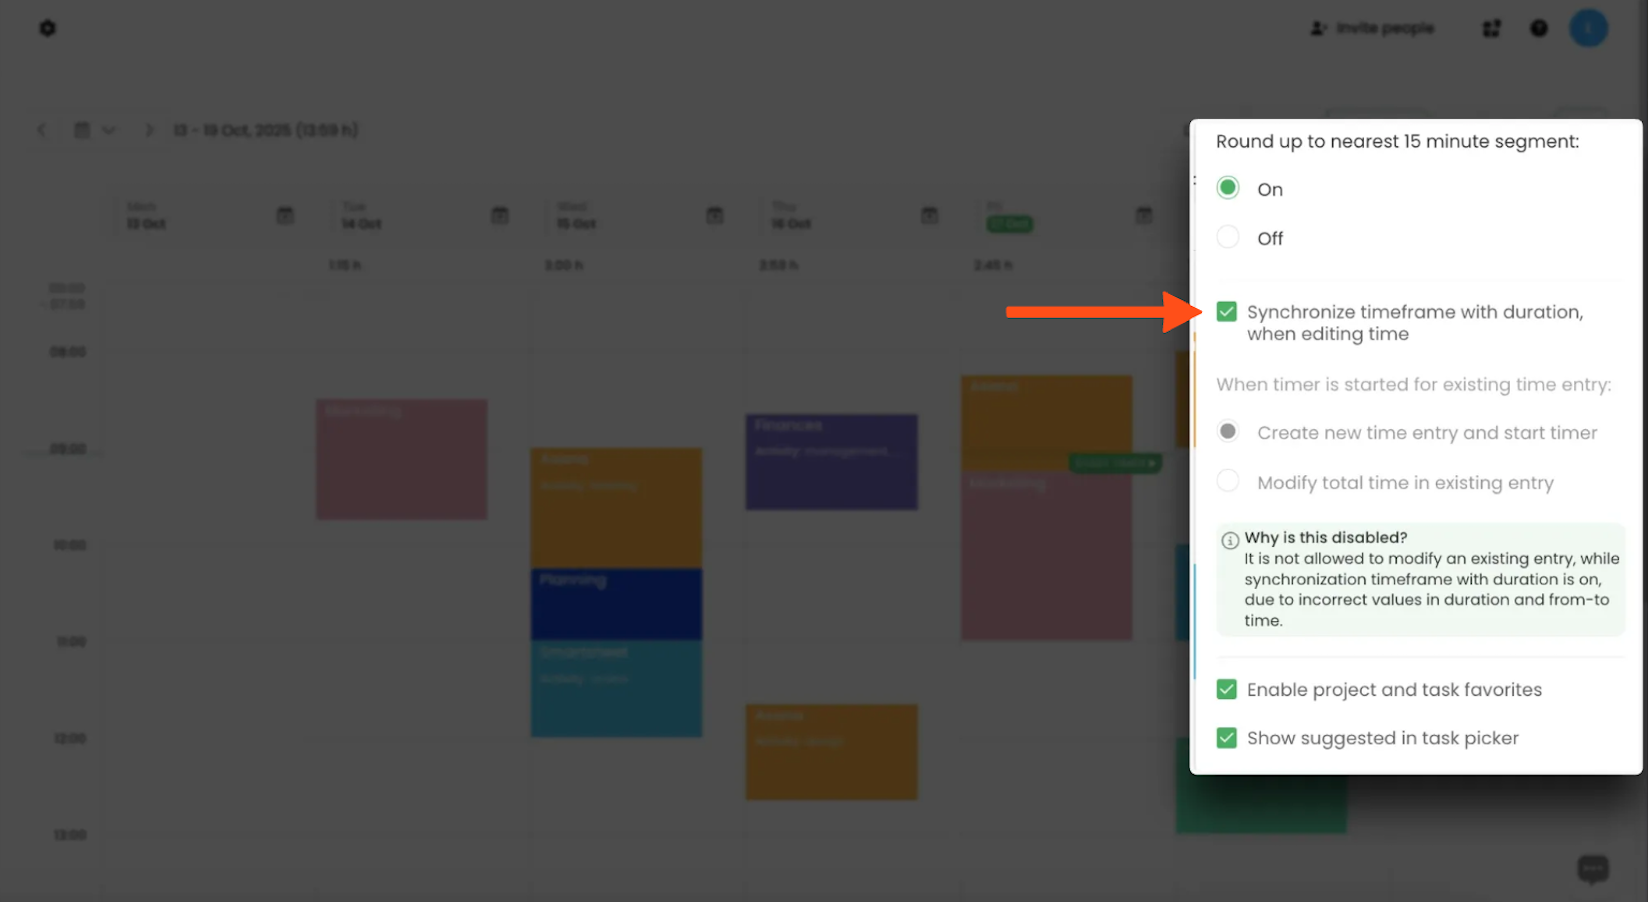
On the right-hand side under the “3 vertical dots” button, you can find some important settings. One of them is Synchronise timeframe with duration when editing time entries. If this option is turned on the start, end, and duration time will be automatically adjusted to match each other while editing time entries. Learn more
Once your timesheet is filled in you can open the editor panel of entry by clicking on it. Here you’ll find almost the same options as in a day view:

- Shows the report to all-time tracked on this task. Learn more
Opens time entry history. Learn more
Delete a selected time entry.
Makes the entry billable/non-billable. Handy if you want to invoice tracked time later.
Change the color of the task. Learn more
Once an entry is deleted the action can’t be undone and data can’t be restored. To recreate the deleted time entry check the history of your Timesheet.
You can also edit timeframes, change assigned tasks, add tags and notes to your entries at any time. To change a task, simply click on it to open an editor panel and next click on the task name to select a different one from the list.
Copying and changing entries' dates is available only in a Day view. Learn more
If you use the desktop app to register computer time and activities you’ll notice the second column next to your time entries. The right column is a quick overview of activities that were gathered by the TimeCamp desktop application during your work: