This checklist covers everything you need to successfully get started with the TimeCamp time tracker. Detailed instructions and advanced capabilities are covered in separate articles. Links to them can be found in the guide below but you can also use the article search box at the top of this page to find descriptions of the features you are interested in.
Let's start tracking time!
We prepared a video Getting Started guide which can be watched at this link. Watch our Guide here!
Before you start
TimeCamp is a SaaS software that allows you to track time spent on projects. We offer 3 versions of the TimeCamp app:
- web application - app.timecamp.com is a full version of TimeCamp that supports all available features;
- desktop application - a small widget that runs in the background and recognizes activities performed on your computer;
- mobile application - an additional which allows you to track time and supports a GPS feature;
Projects can be created manually by users or imported from the CSV file and other programs the users choose to integrate with. Budgets can be added to projects and the team can be held accountable based on the recorded data.
You can also track computer activity, such as websites visited and time spent on each document. To track computer activity, use the desktop application which is free to download from the web application.
Support
We provide free support for all users. Our technical Agents are available Monday-Friday. Fill in the Contact Form and provide as many details as possible.
We also encourage you to browse through this Help and Documentation page, to learn how to use TimeCamp and find answers to your questions.
We offer 24-hour chat support for the Starter, Premium, Ultimate and Enterprise plans' users.
Terms & conditions
You will find all about our terms and conditions here.
System navigation
Create and set up your account
Go to https://app.timecamp.com/auth/register and create the account. You will become the Account Owner who owns all the data on the account, is able to invite new users to this account, and change account settings.
After signing up you will be introduced to a quick onboarding tour, which we recommend to go through.
When you log into your account, you will see the main module called Timesheet. This is where you will add and see your daily tracked tasks, ready to edit at any time if needed.
On the left side of the interface is a menu that you can quickly expand or collapse by clicking on the menu opener (the > icon). There you will find reports, active modules, and the Users manage tab.

The left side menu contains some additional options to help with customizing this view and keeping only the most important tabs.
By hovering mouse on a specific module, a "3 vertical dots" button will appear. Under this button you can find 2 options:
- Hide element from the menu
- Pin to the top of the menu

By clicking on the arrow next to the category name, you can collapse or expand the list of modules under this specific category.

The Show more/less button at the bottom of the menu can show you all modules available on the account both enabled and disabled or hide those disabled ones. Disabled modules will be greyed out on the list.

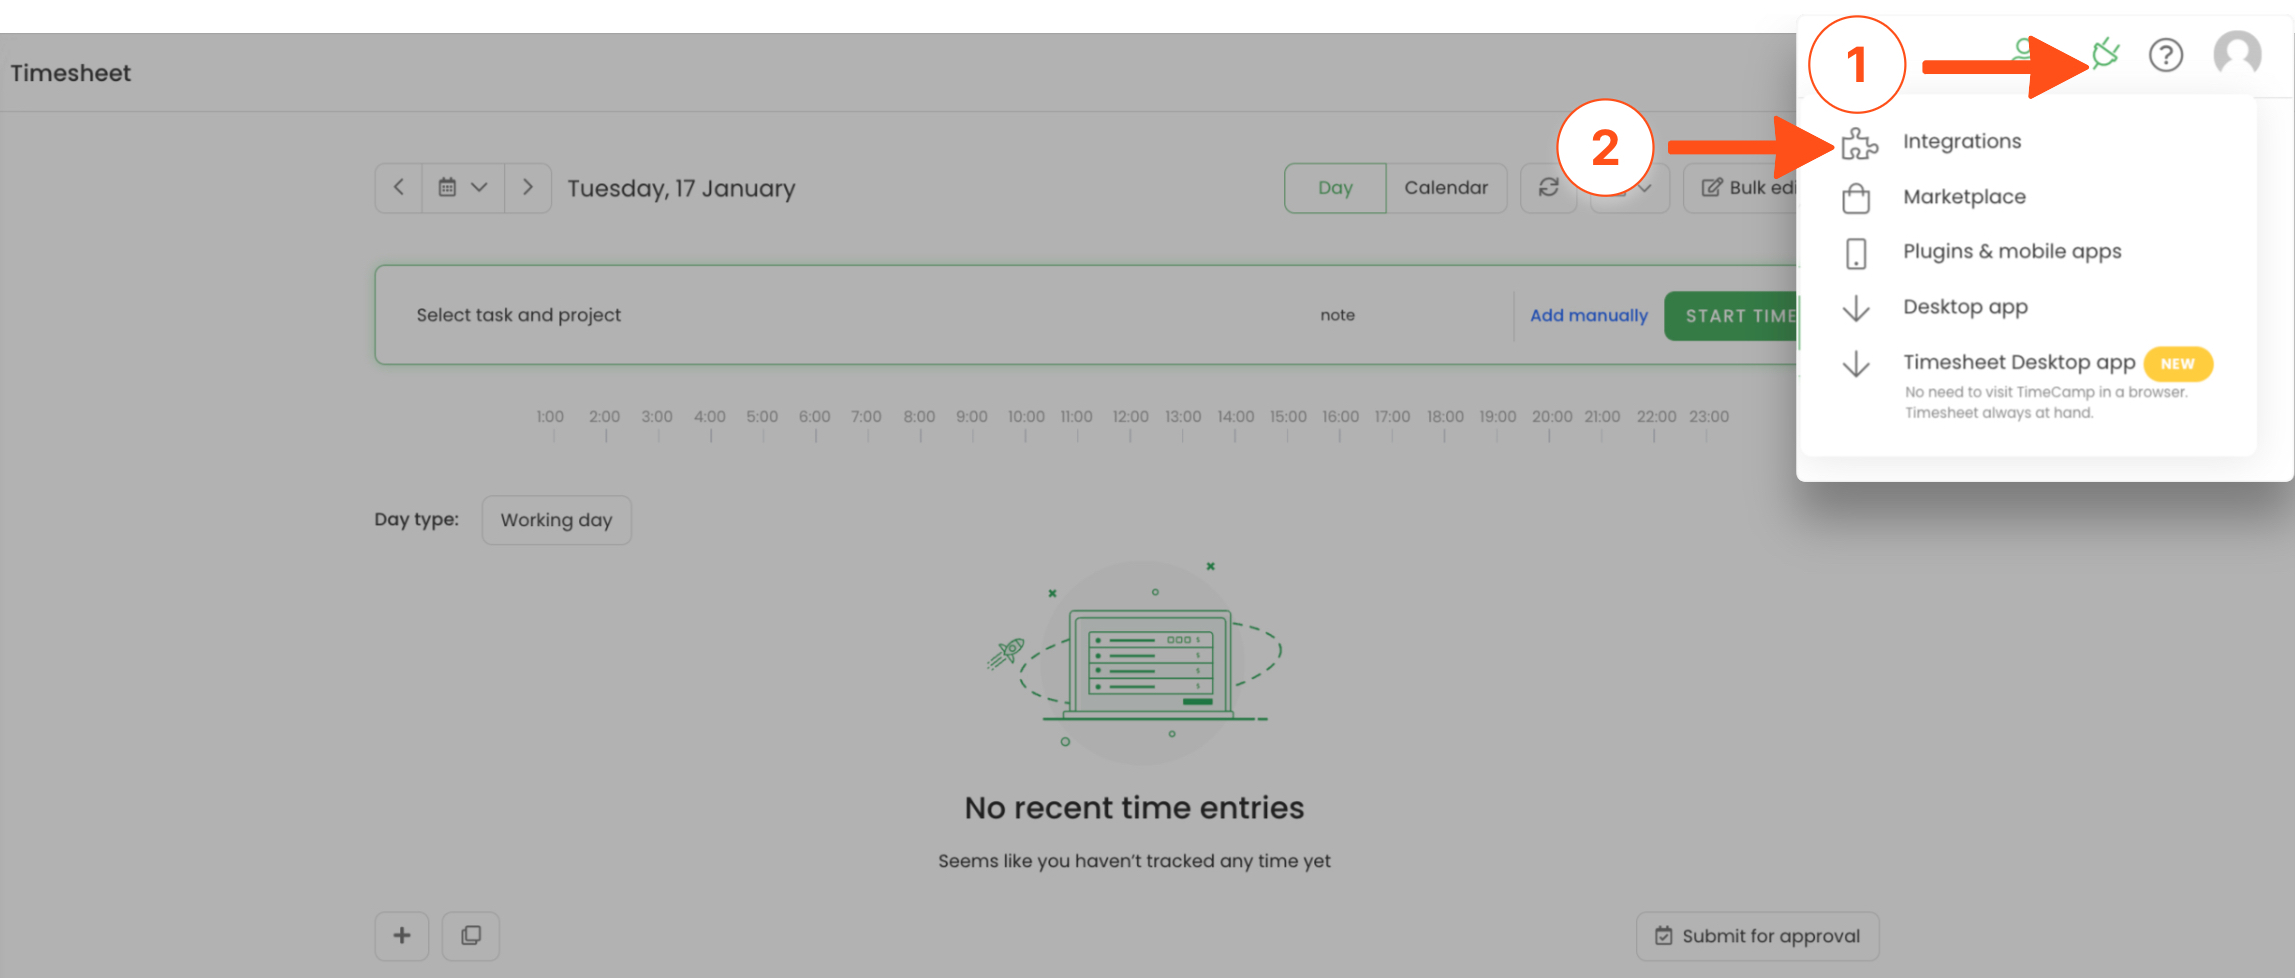
In the upper right corner, you'll find 4 icons:

- human + icon - allows you to invite users from any place on the website application;
- plugin icon - here you can find the list of Integrations, download the desktop app, and check information about plugins and mobile app;
- help (“?”) icon - here you can find link to Help documentation and contact the Support team, send us your feedback, request a feature and get more information about API;
- my profile (avatar) icon - allows you to go to the Profile setting, Account settings, and Subscription menu;
Only the Administrator of the account has access to the Account Settings and Subscription menu.

Account Settings will redirect you to:
- General - company name, time, date and duration format;
- Modules - the list of available modules and features;
- Billing Rates - a tab that appears after you enable the Billing module and where you can define specific rates to your users and projects. Learn more

If you don’t see the Account Settings and Subscription icons - you are either a user, supervisor, or guest and your permissions on the account are limited. Contact the Administrator of your account to change your permissions.
The Profile settings option leads to your personal settings. Here you can change your email address, password, language, enable dark mode, adjust email notifications, etc. Administrators also have access to the profile settings of users they manage. Learn more
When it comes to the time zone, it will be automatically adjusted to the time zone of user's computer.
Invite users
If you are an account Administrator, you will see the Users module on the left side menu. Open it and click on the green Invite people button to invite your team to TimeCamp.
If you're subscribed to a paid plan, make sure that you have enough seats before inviting new users.

You can invite users in 3 ways, depending on your needs:
- manually enter email addresses in the empty fields;
- create an invitation link and send it to your colleagues
- invite multiple users at once (import CSV file with addresses of your team)
At this point, you can optionally assign projects and modify permission for these people.

Invited users must accept the invitation sent to their email address to become a part of your team on the account.
After inviting people, you will see their names in the Users tab and you can decide what role on the account each person has.
What if the person already has an account?
You can still invite users who already have a separate account. They will receive an email invitation with a link and after accepting the invitation their account will appear on your Users list.
Once the invitation is accepted, only their computer activities will be transferred to your account. To transfer other data, such as time entries and projects, fill in the Contact Form and describe all the details of your case. If you do not mind losing them - just accept the invitation.
By transferring a previous account to a new one, the owner of the account you joined becomes the owner of all the recorded data.
What else can I do with users?
If you need to create user groups, TimeCamp allows you to recreate your company’s structure. One user can belong to multiple groups and have different roles in each of them. Learn more
Groups are extremely helpful if you have many users and/or need different settings for each group of people, e.g. different default workday lengths, different hourly billing rates, or other time-tracking rules.
Create projects
You can create projects and tasks from two places on the website:
Projects - go to the Projects tab on the left-side menu, then click the New Project button. Name the project and save it by clicking the Create New Project button. To add a task or subtask click or hover the mouse cursor on the desired project and click on the "plus" button.

Timesheet - go to your Timesheet on the left-side menu and click on the projects search box, where you will also see a full list of your existing projects. Next, click the gray plus icon and decide whether you want to add the task to an existing project or create a new one.

You can edit your projects at any time.
Assign users to projects
Go to the Projects module and click on the project you want to assign people to open the edit panel. In the edit panel, just underneath the name of the project, you will find two buttons - Assign group and Assign people. The first button allows you to add an entire group of people to the project and the second button allows you to add only selected users.

Project roles
After creating a project or task and assigning your colleagues to it you can define their roles in each project and task. We provide 2 default roles: Project Manager and Regular User. With the Ultimate plan, you can also create custom roles and modify permissions. Learn more
Remember - those project roles are separate from account roles and do not affect each other, so an account User can successfully act as a Project Manager in a selected project.
Budget
Each project can have its own budget and can be defined as Estimated hours or Estimated fee. Moreover, you can set an hourly billing rate for each user in a specific project or task. Learn more

Under the budget, you'll find an option called "Time from this task is billable by default". If the checkbox is marked, any time entries for this specific project will be automatically marked as billable.
Tags
You can create your own lists with an unlimited number of tags inside. To each project, you can add specific tags or a full list of tags. Tags will be very beneficial while reporting since you can use them as one type of filter. Moreover, you can select mandatory tags, so chosen tags are obligatory to select. Learn more

The Tags module needs to be enabled in Add-ons first. You can create and manage lists of tags in the Tags tab on the left side menu.
Integrate with other software
If you use other software such as Trello, Asana, Monday, etc., you can easily connect them with your TimeCamp account. Integrations will allow you to store all the tasks and boards you need in one place - in the projects tab on your TimeCamp account. The imported tasks will be visible as projects, so you can assign people to them, set their roles in projects, add budgets, and much more. You can also integrate it with your calendar and have all your events on your timesheet.
To enable the integration, navigate to the plugin icon in the upper-right corner and click on the Integrations option. Then, scroll through the Integrations page or use the search box to find the integrations you need.

To find detailed instructions on enabling a specific integration, type the name of the software in the articles search box at the top of the Help and Documentation page or use this link.
If there is a missing integration, you can create it on your own with our Developers API. The API documentation is available here.
Track your time
You can track time spent on your projects in 4 ways:
web application (timesheet)- manually start a timer for the selected task, or add the total duration if you forgot to start the timer earlier. Learn more
desktop application - track time and collect the activity of your computer. You can use manual or automatic mode. Automatic mode can take your mind off thinking about switching between tasks with its ability to recognize keywords. Learn more
plugins - our plugins allow you to track time to your projects directly from the website you are on. Learn more
mobile app - great solution when you are away from your computer and when you want to track GPS. The mobile app is an addition to the web application and some actions such as adding users, customized reporting, or deleting projects are not available. Learn more
A new TimeCamp timesheet app for desktop is available! Find it here – we truly appreciate your feedback!
Reports
Now that you have tracked time to your projects, you can see the report from your work. Pick one from our wide range of reports that will suit your needs, apply filters and see your progress. Learn more

Reports can be exported in different formats - PDF, CSV, XLSX, and Google Spreadsheets. When you need the same type of complex report every day, week, or month, a great option is to create periodical emails which will be automatically sent to chosen addresses with the selected filers.

Computer Activities
After installing the desktop application you can not only track time on tasks but also register names of visited websites and apps and how much time you spent working on them. Computer Activities reports will allow you to check the list and timestamps of each activity, define activities' categories for productivity tracking, check the away time, set goals, and optionally view recorded screenshots. All settings and tracking options could be adjusted to your needs. Learn more

Timesheet Approvals
Timesheet Approval is a feature that allows managers to approve time submitted by users on their timesheets. When activating the module, you can select a daily or weekly approval period and decide who can approve submitted timesheets. You can also reject the submitted timesheet, leave a note indicating the deficiencies and allow the user to complete them. Learn more

Attendance
The Attendance module is ideal for monitoring users working hours and days off, such as vacation, sick leave, holidays, etc. Users can compare the actual hours they tracked with the efficiency and request days off. Administrator can set vacation hours and holiday dates for each user group for the entire year. Learn more

Invoicing
Invoicing feature allows to create invoices based on tracked hours as well as create invoices based on an empty template and inputting custom information. After enabling this feature you can create a list of your Clients for billing purposes and later you can create an invoice based on tracked time and send it to your clients. Learn more
